Manage Dialogflow Machine Agents
A machine agent allows a web chat contact to have a conversation with a chatbot. A machine agent is associated with a particular project and location as configured in the Dialogflow CX model on the Google Cloud platform. As you may have access to many agents across different projects, you must select the agent's parent project and location, in addition to other parameters described below.
You can add and update (via importing) Dialogflow machine agents.
- In the main menu, click Dialogflow.
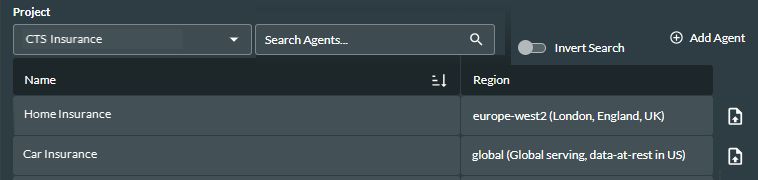
- Select a Project (you can filter the list).
- The project's agents are displayed, and you can use the Search Agents field to filter the list.
The fields are described in the table below.
|
Field or Option |
Description |
|
Name |
The agent name. |
|
Region |
The region specified for the agent in Dialogflow. |
Add a Dialogflow Agent
- In the main menu, click Dialogflow.
- Click the
 Add Agent button.
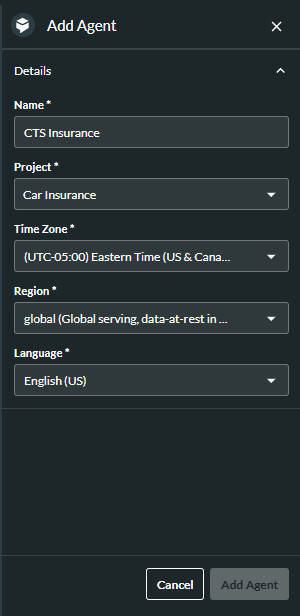
- Enter a Name for the agent. This must be unique.
- Select the Project the agent will be assigned to.
- Select the Time Zone specified for the agent in Dialogflow.
- Select the Region specified for the agent in Dialogflow.
- Select the Language specified for the agent in Dialogflow.
- Click the Add Agent button.
Update an Existing Dialogflow Agent
- In the main menu, click Dialogflow.
- Click the Import
 button next to the agent.
 - In the Import Agent dialog, select the .blob file to be uploaded. Either drag and drop it into the area provided, or click the Upload
 button, and then navigate to the required file.
 - Click the Save Agent button to save the new location ID.
Note: there is currently no visual indication in the user interface to indicate that the agent has been updated.