Create a script for handling incoming communication
You must:
Create a script of type 'Response'.
Add action cells.
Connect action cells. This defines communication flow through the script.
Configure action cell properties. This defines your script functionality.
Commit the script to storm. This makes it available to other storm applications (for example, to the INBOUND application in the storm Admin Portal, where it can be assigned to an access point).
Refer to The FLOW graphical interface for assistance in the following sections.
Select the New ![]() button on the toolbar and then select the 'Response' option:
button on the toolbar and then select the 'Response' option:

Note: this is the default script type when you launch FLOW.
|
1. |
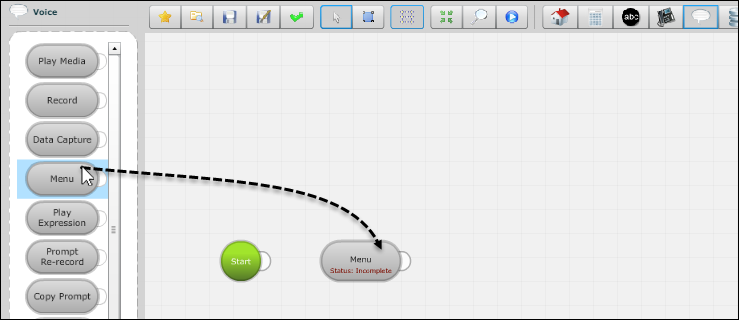
Display the relevant action cell panel by clicking a button on the panel selector. |
|
2. |
From the panel, drag and drop the desired action cell type to the right-hand side of the Start action cell on the workspace:
|
|
3. |
Add more action cells as required. |
Note: to delete an action cell, select it and then click Delete Action Cell in the action cell properties panel.
To delete multiple action cells, click ![]() on the toolbar, draw a marquee around the cells to delete and then press the keyboard Delete key.
on the toolbar, draw a marquee around the cells to delete and then press the keyboard Delete key.
|
1. |
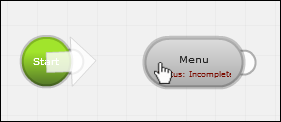
Click the Start action cell's connector
Click anywhere on the first action cell that should run in the script. The two action cells are connected:
|
|
2. |
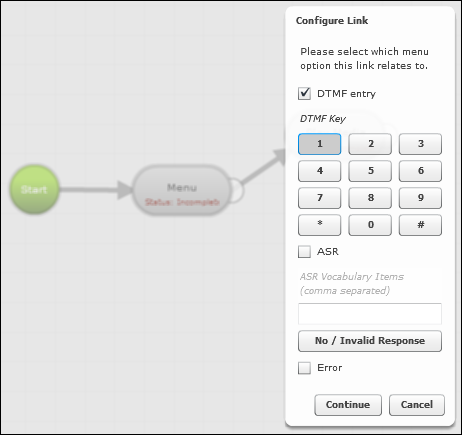
Connect two action cells by clicking the connector on the source cell and then anywhere on the target cell. On selecting the target cell, you may be presented with a dialog prompting you to choose from a set of exit points for the source cell. Select the appropriate exit point and then click Continue. (Exit points are documented in the FLOW action cell reference.)
|
|
3. |
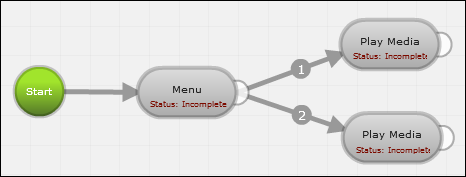
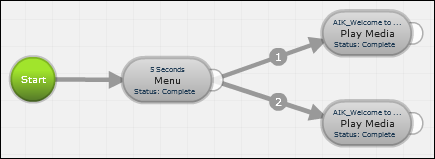
Complete all connections:
|
|
1. |
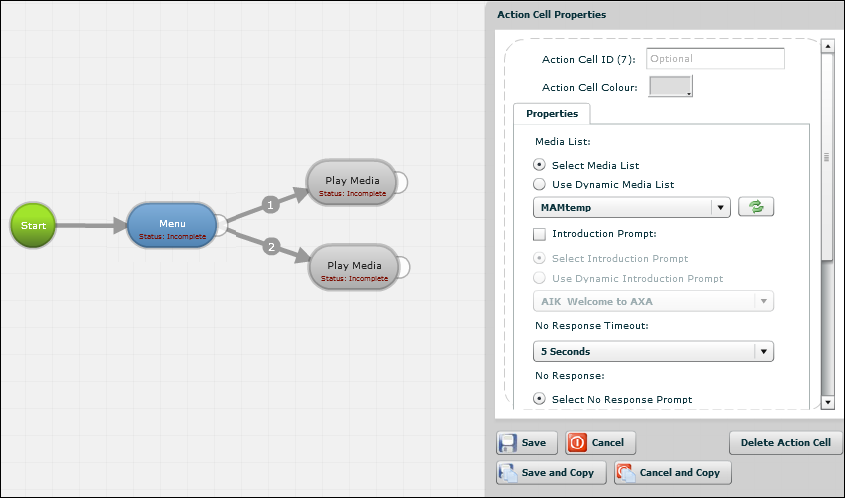
Select an action cell and then configure its properties in the action cell properties panel. (See the FLOW action cell reference.)
Action cell fields accept literal values, variables, or both. A literal value must be preceded by an '=' character. |
|
2. |
For an action cell with mandatory exit points that are not connected to other action cells, click its Exit Points properties tab and select the End Script check boxes next to those exit points. By doing this, you are instructing FLOW to exit the script when any of these exit points are encountered. Do this for all such action cells.
|
|
3. |
Click Save to save the action cell properties. |
|
4. |
Ensure that the status of all actions cells is 'Complete'. For an 'Incomplete' action cell, check that you have configured its properties correctly.
|
|
5. |
Click Save |
Click Commit Version ![]() and then click Yes in both the Commit Revision and Real-Time Events dialogs.
and then click Yes in both the Commit Revision and Real-Time Events dialogs.
Notes: committing saves the script automatically.
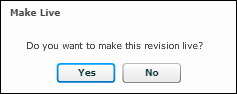
If a script has previously been assigned to an access point, you will see a Make Live dialog in which you should click Yes:
You can make any version of a script live from within the window used to open scripts:
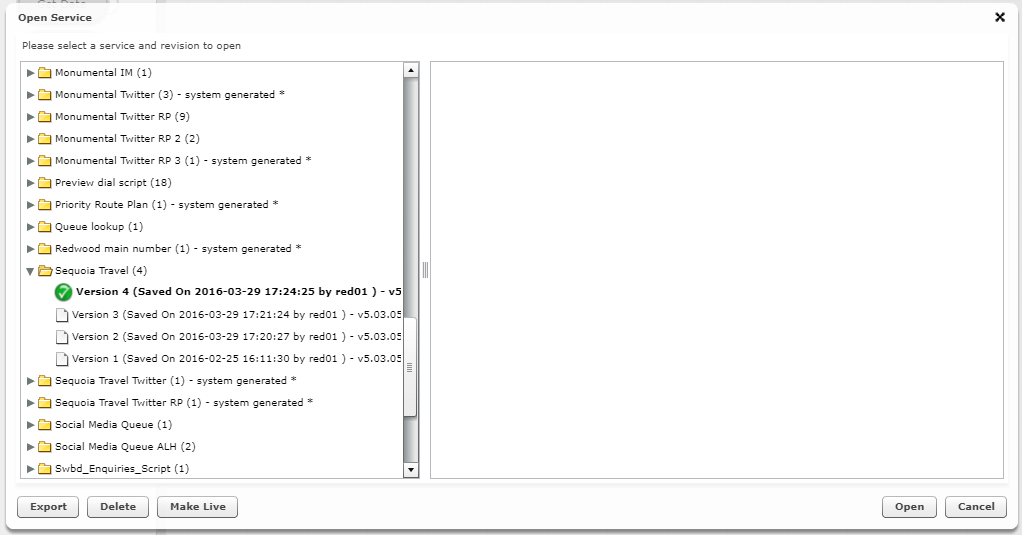
In this window, the live version has a green tick against it. To make a different version live, select that version and then the Make Live button.
 . This displays a large arrow: