Set Time-Of-Day Schedules
OUTBOUND allows you to define the time of day during which calls can be placed to customers, based on a particular factor, such as the customer's country or stated preferences. You may wish, for example, to allow for the time difference between customers in different time zones, by setting dialling times that begin and end at different times for each locale.
This is controlled using dial times profiles, which allow you to associate values that might be found within a specific column in a specific table view being used by the campaign with a corresponding start and end time.
When setting up the campaign, you are able to select a dial times profile to be used.
Create a Dial Times Profile
- From the STUDIO main screen, select Outbound > Dial Times Profiles.
- Click the + button.

- Name the profile and then enter a value and the associated start and end time. The values must match those in the DATA MANAGEMENT table view column assigned to the campaign.
- Use + to add further values with associated start and end times.
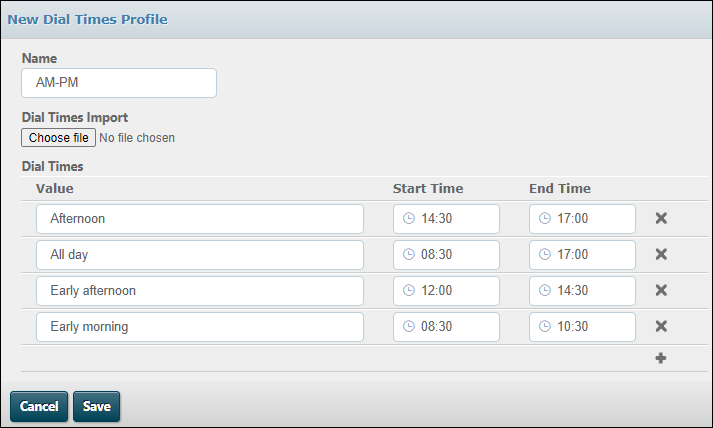
- Click Save.
Note: to amend an existing dial times profile, open it, then click the pencil  button.
You can import values from a CSV file using the Choose File button. The file must have three columns as shown:
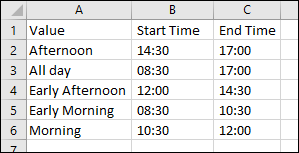
The imported values are included in the dial times profile when you click Save.
Assign the Dial Times Profile to a Campaign
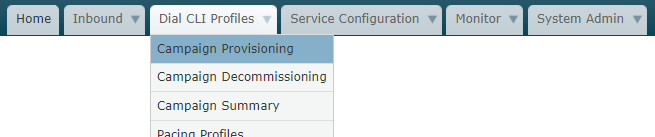
- From the third tab, select Campaign Provisioning.
- Select the campaign (indicated by the 'Service').
- For Dial Times, select 'variable'.
- Select the table view column (configured in DATA MANAGEMENT) that contains the values in the DIAL times profile, and then select the DIAL times profile.
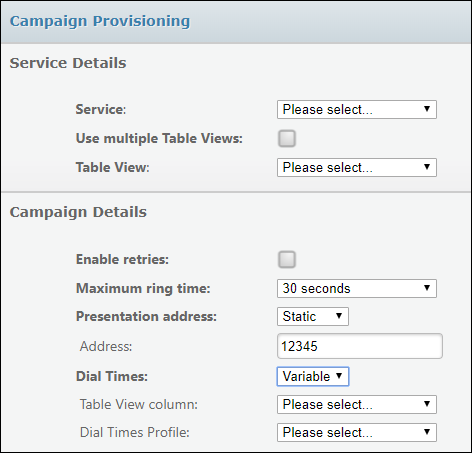
- Click Save.